⁉️Create a Quest Profile
In this guide we will create a quest profile with different quests and events to help understand the Quest Manager.
Quest Manager is compatible with popular Quest addons (e.g. Zygor).
The procedure for creating a quest profile is the same for each game.
We start our guide in the Dwarves starting area as mage with a level 1 character.
Index
Quest Manager
Start your desired game, log in and enter the world.
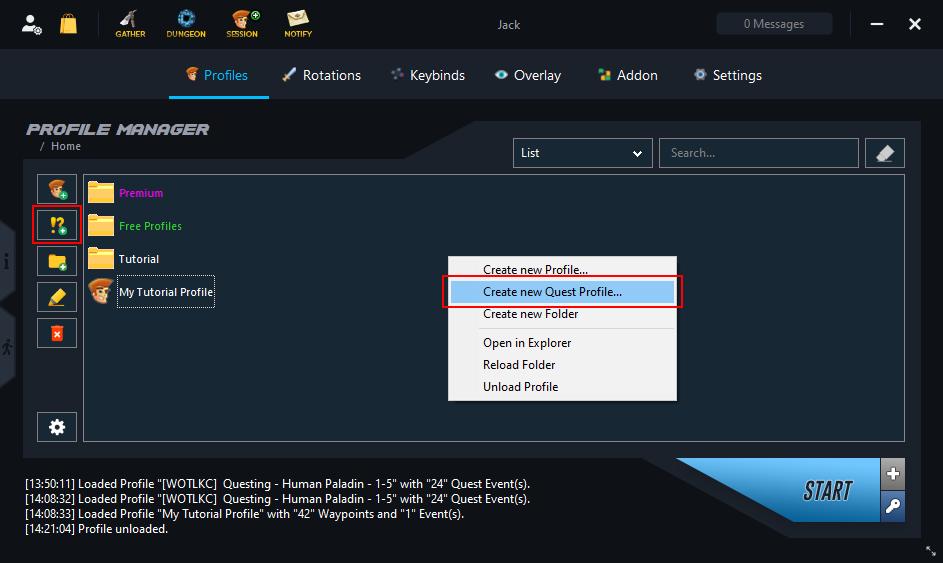
Open your Profile Manager and click on the left button. (Alternatively, you can also right-click to open the context menu.)
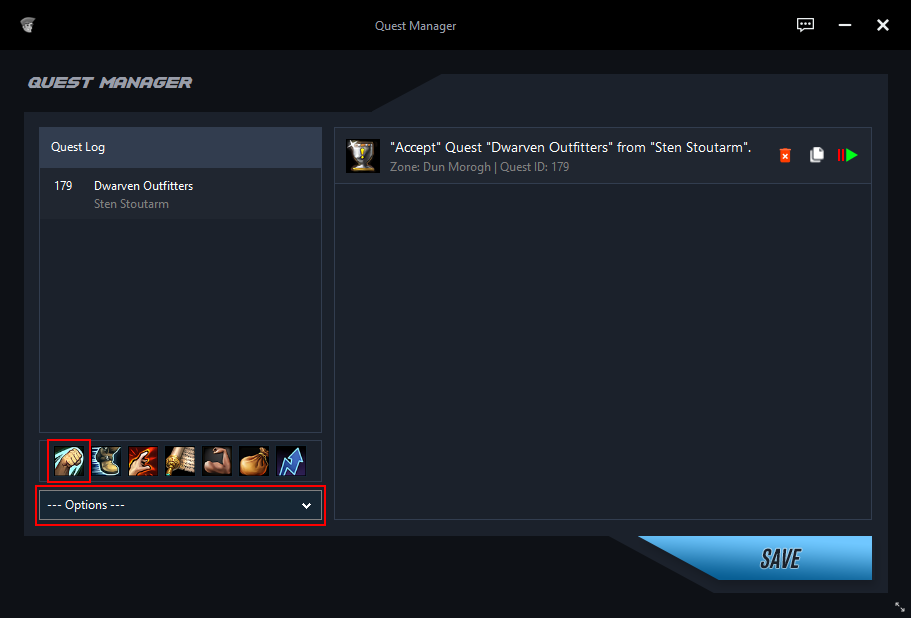
To understand the structure of the Quest Manager, here is a brief overview:
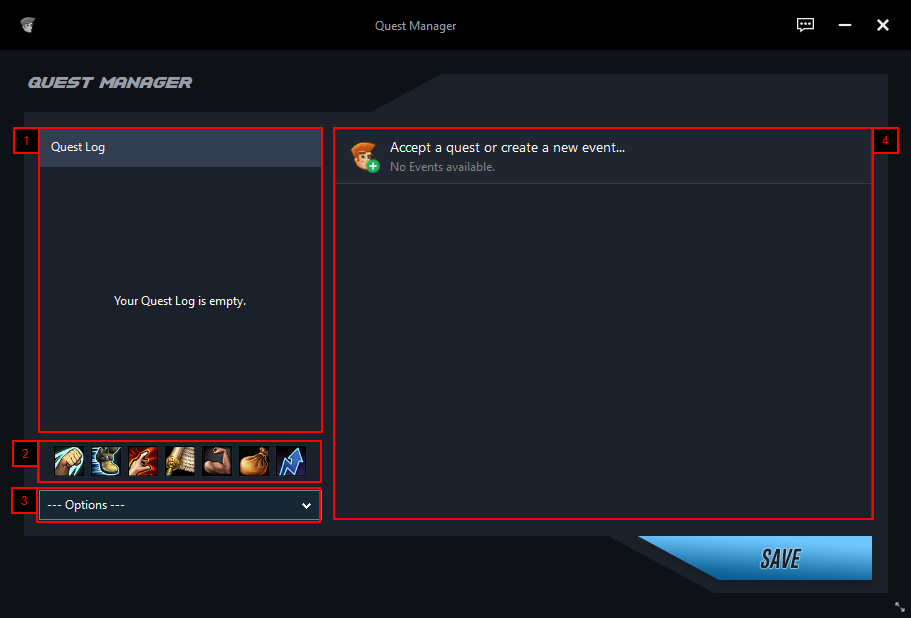
The Quest Log shows you live all quests that are currently in your Quest Log.
You can execute the most important events directly via the Quick Options. With the blue arrow (right) you can use the Quick Options as a separate window.
You can use the selection field to use additional events and edit profile settings.
Here you can see all accepted and submitted quests, as well as all events and information about event and quest settings that you have added to your profile.
Accept a Quest
Accept the first available Quest.
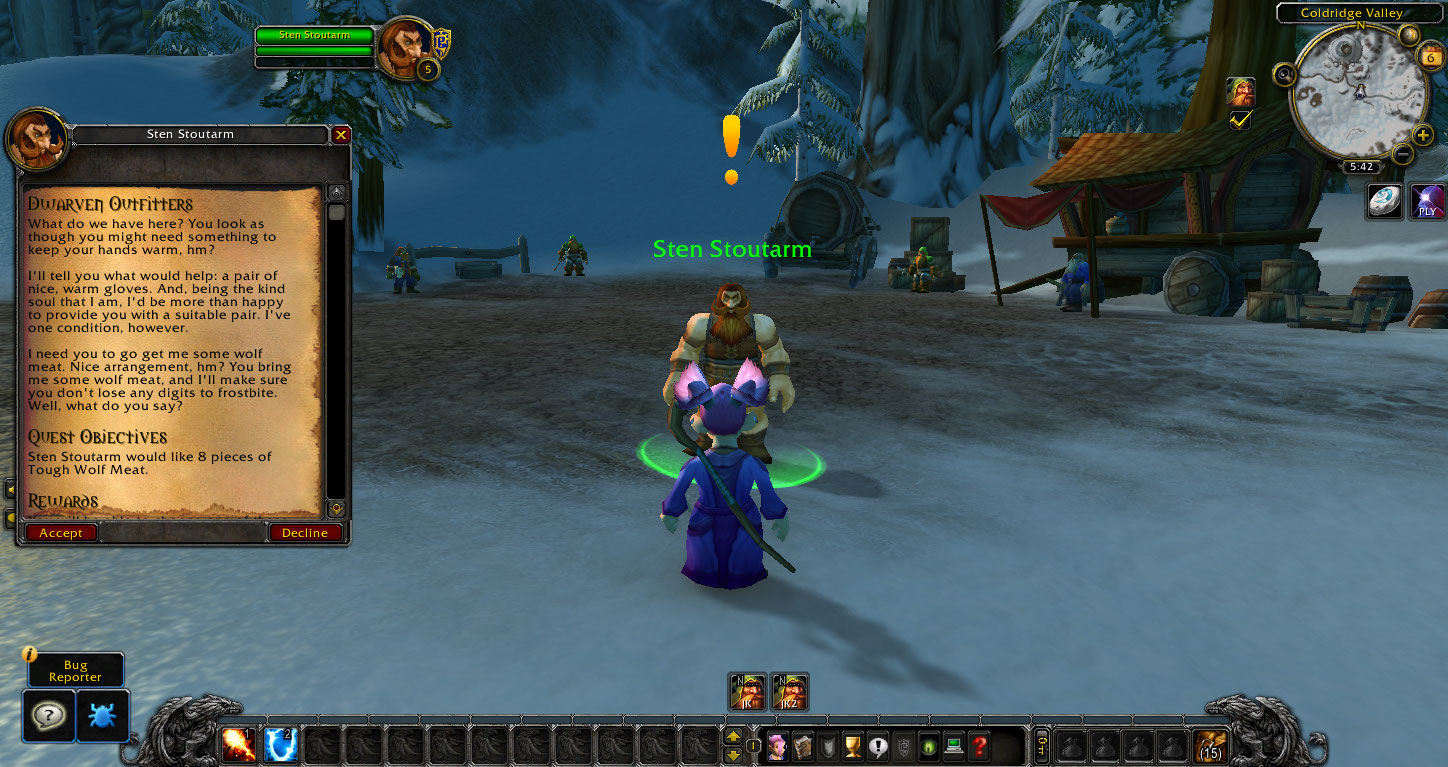
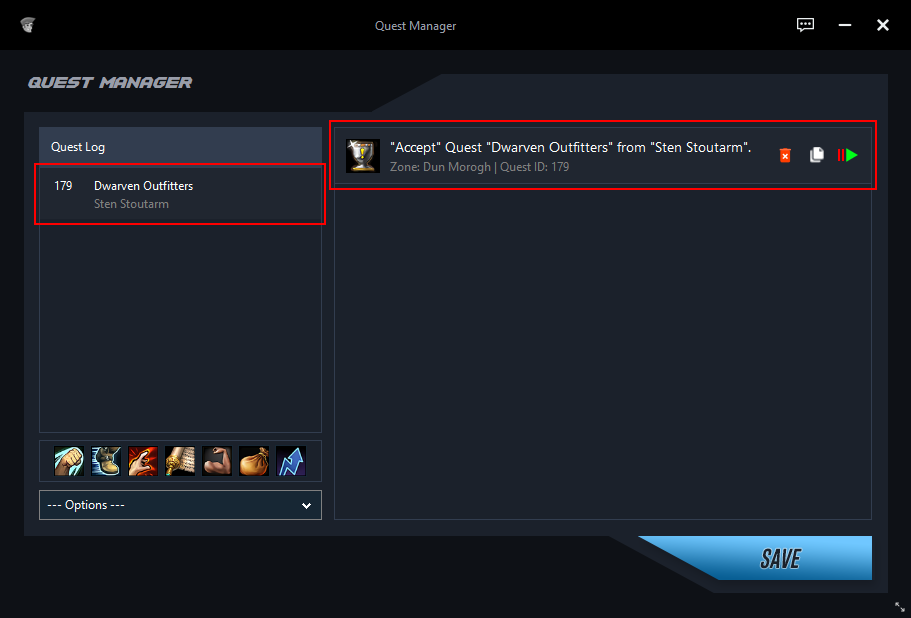
After we accepted the quest, it was added to our Quest Manager in the quest log as an event.
To complete the quest we need 8x Tough Wolf Meat.
Do Quest
Create a "Do Quest" event by clicking on the "Fist" button or via the selection field.
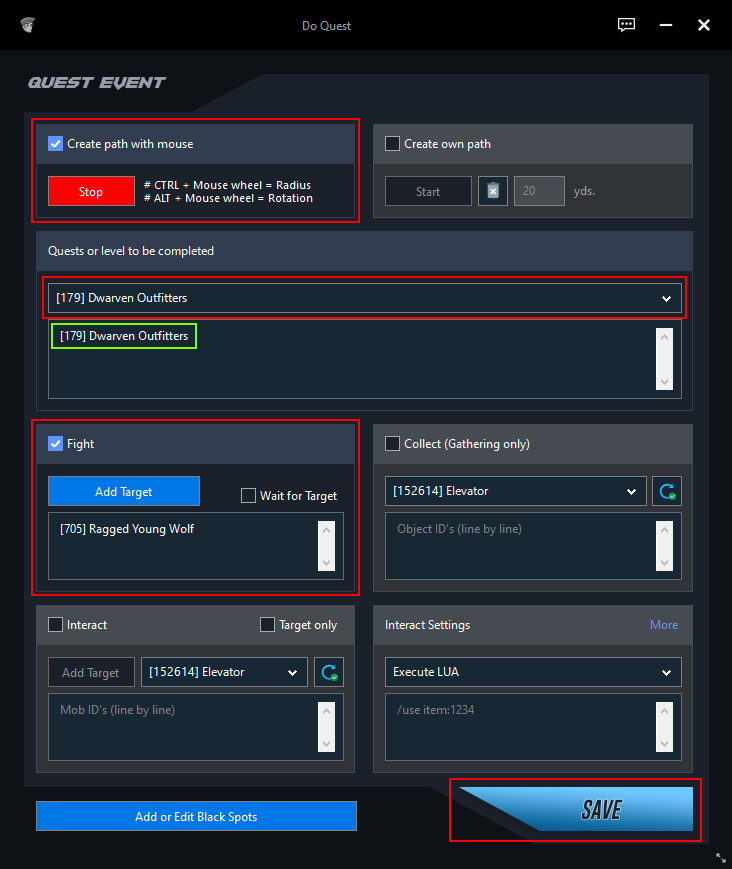
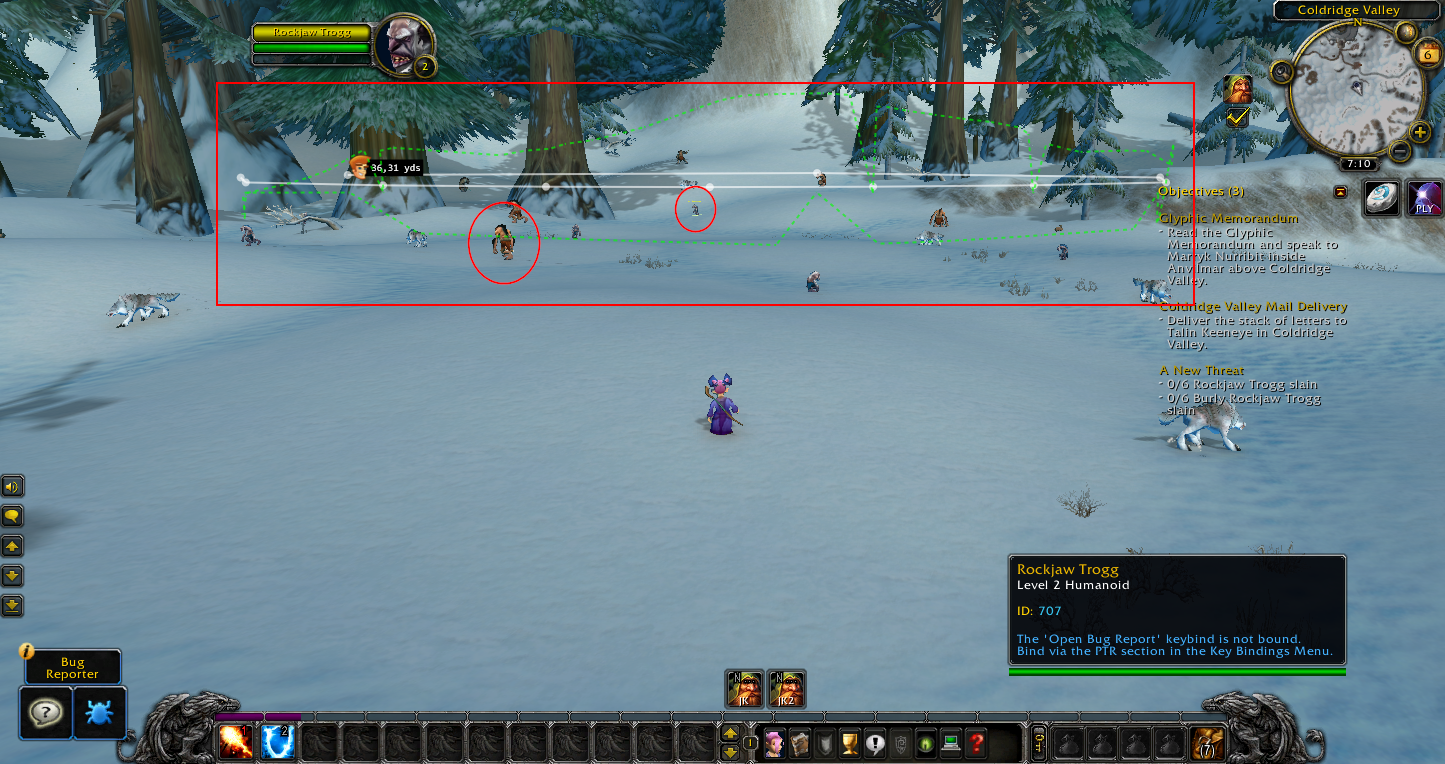
We now create a path, specify the quest to be done and add our objectives.
Create the Path
Click on "Start" under "Create path with mouse".
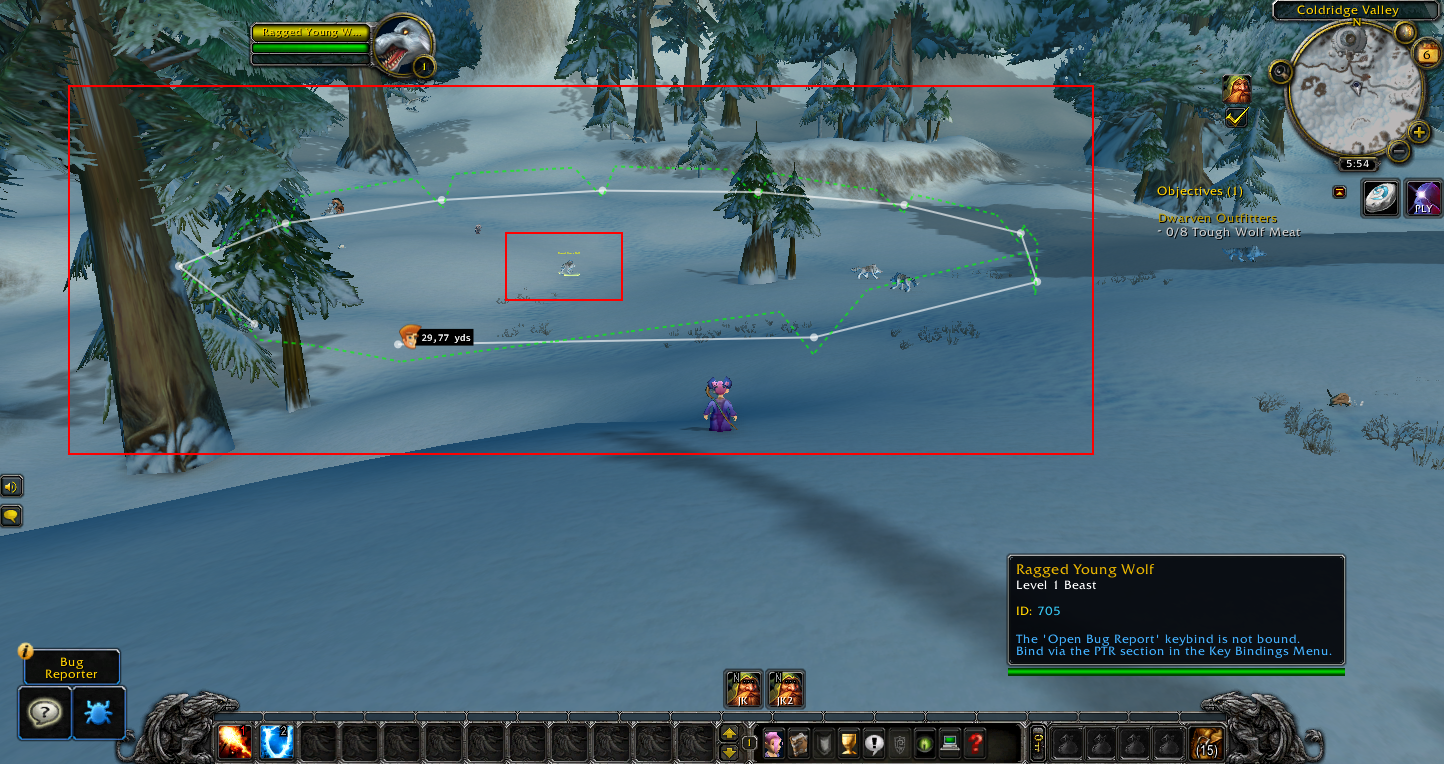
Choose a target that is centered in the area where we want to collect our Meat.
Select the target until you see a green and white circle around it.
Press CTRL + mouse wheel up/down to enlarge or reduce the circle.
Click on "Stop" when you think the path is big enough.
Add Quest(s)
In the selection field, choose the quest(s) to be completed on this path.
Add Targets
Take a "Wolf" into the target and click on "Add Target".
Save
Click on "Save" to save this event.
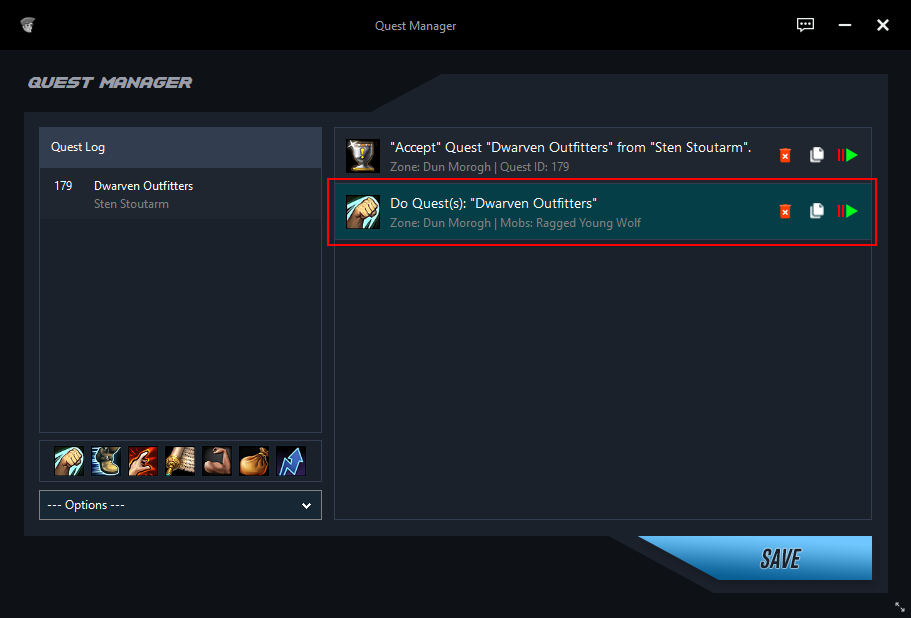
Turn-In Quest
If we don't want to complete the quest but still want to turn-in, we can do it directly through the Quest Manager.
Target the quest giver.
Click on the quest in the Quest Log in your Quest Manager.
Click on "Options" and choose "Add as Turn-In Quest".
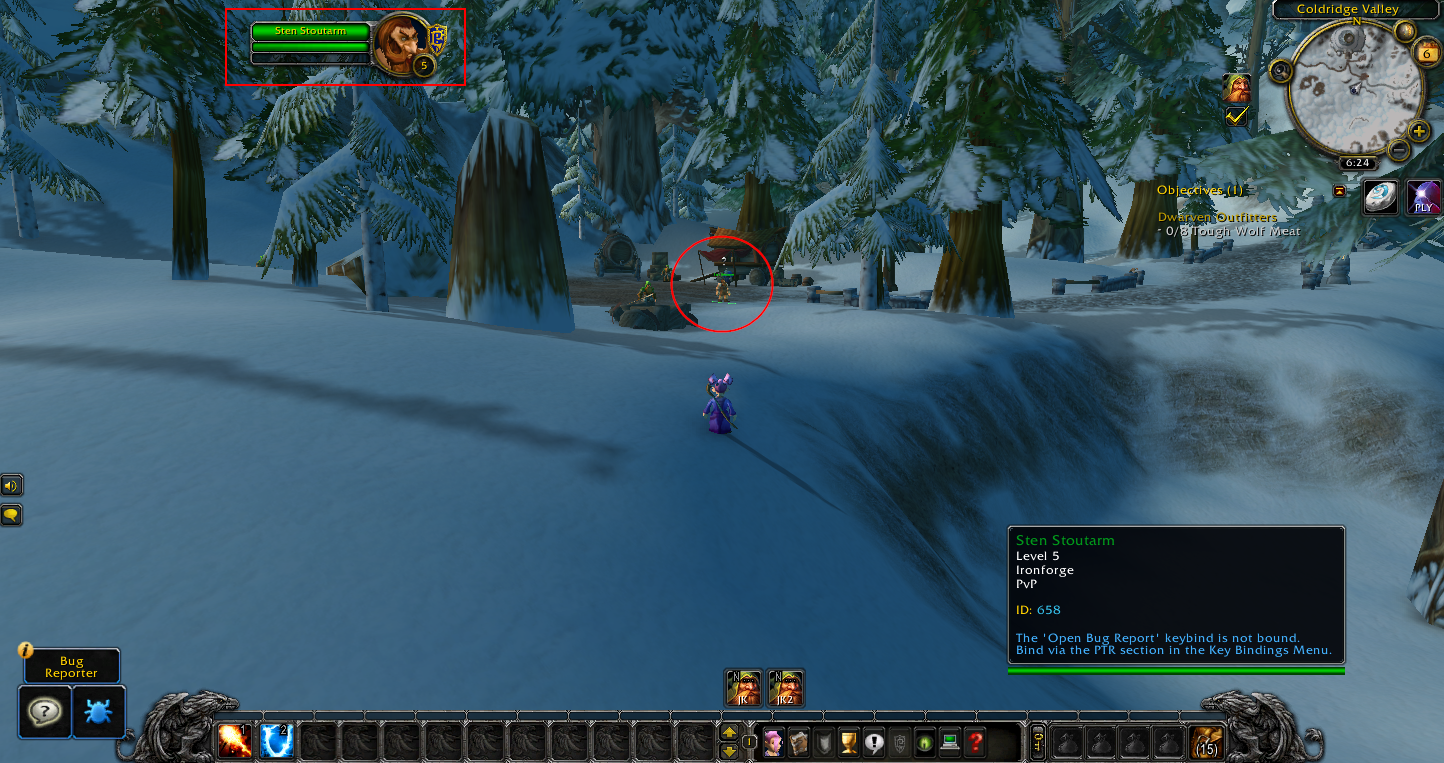
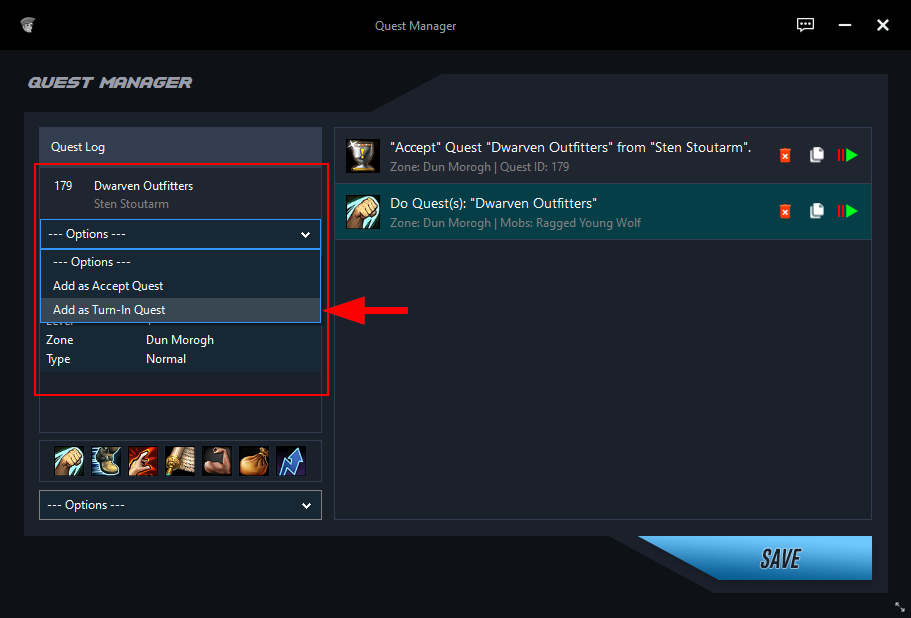
Alternatively, you can complete the quest in-game and turn-in afterwards.
Save Quest Profile
Save the quest profile using the "Save" button.
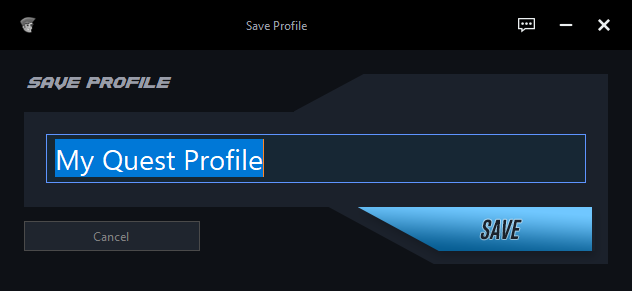
Open the profile again with a double click.
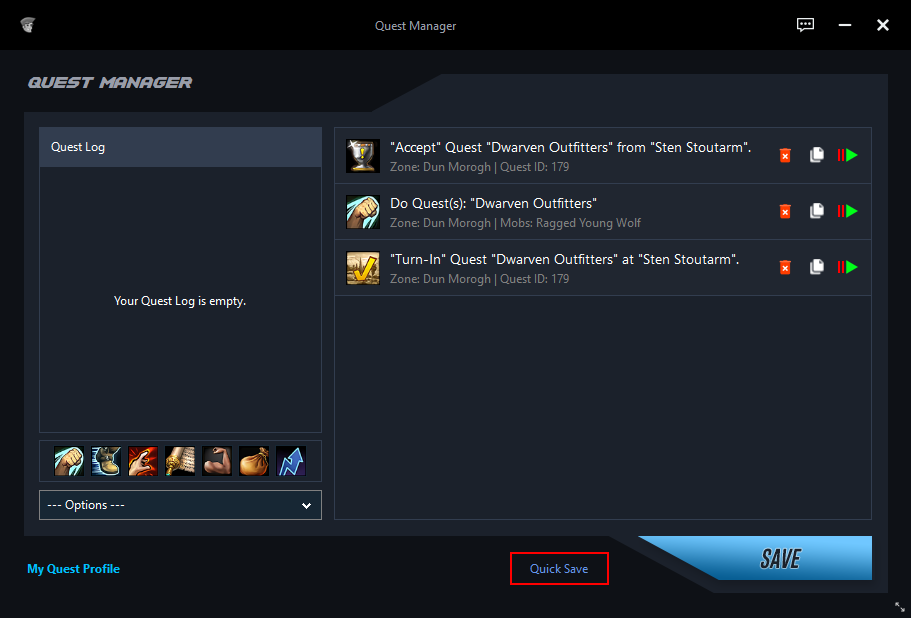
In the editing mode, we now have the option to quickly save the profile by clicking on "Quick Save".
Test and Edit Quests
We don't want to do the quest ourselves. So we're going to let Jack do it for us.
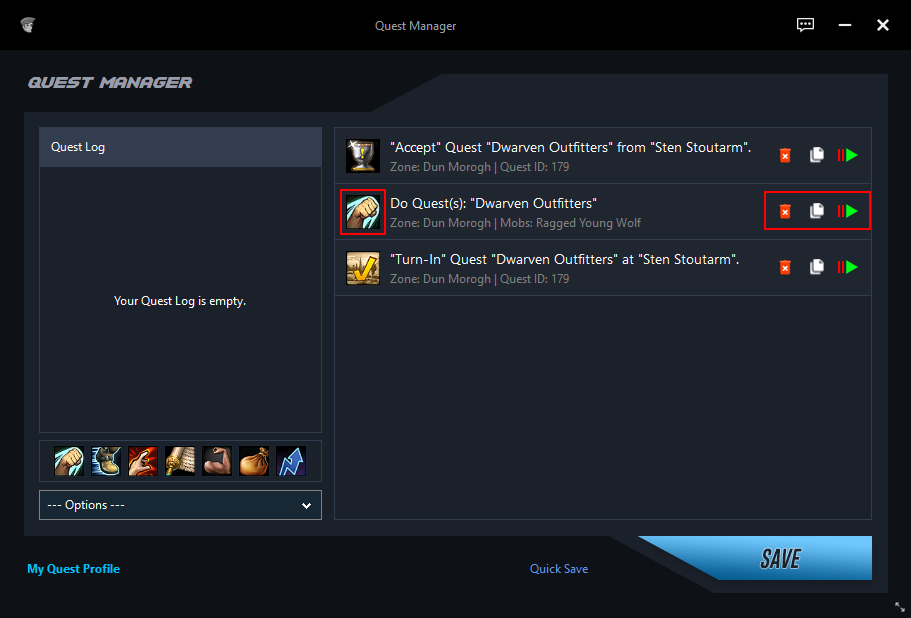
Click the "Play" button to the right of your "Do Quest" event to let Jack collect the meat.
Using the "Copy" symbol you can change events in their order.
Alternatively, you can change the order by holding down the mouse button on the event symbol (left).
More Quests
After Jack finishes the quest for us and turns it in, we will move on to the next quests.
Accept all 3 Quests from the next 2 quest giver.
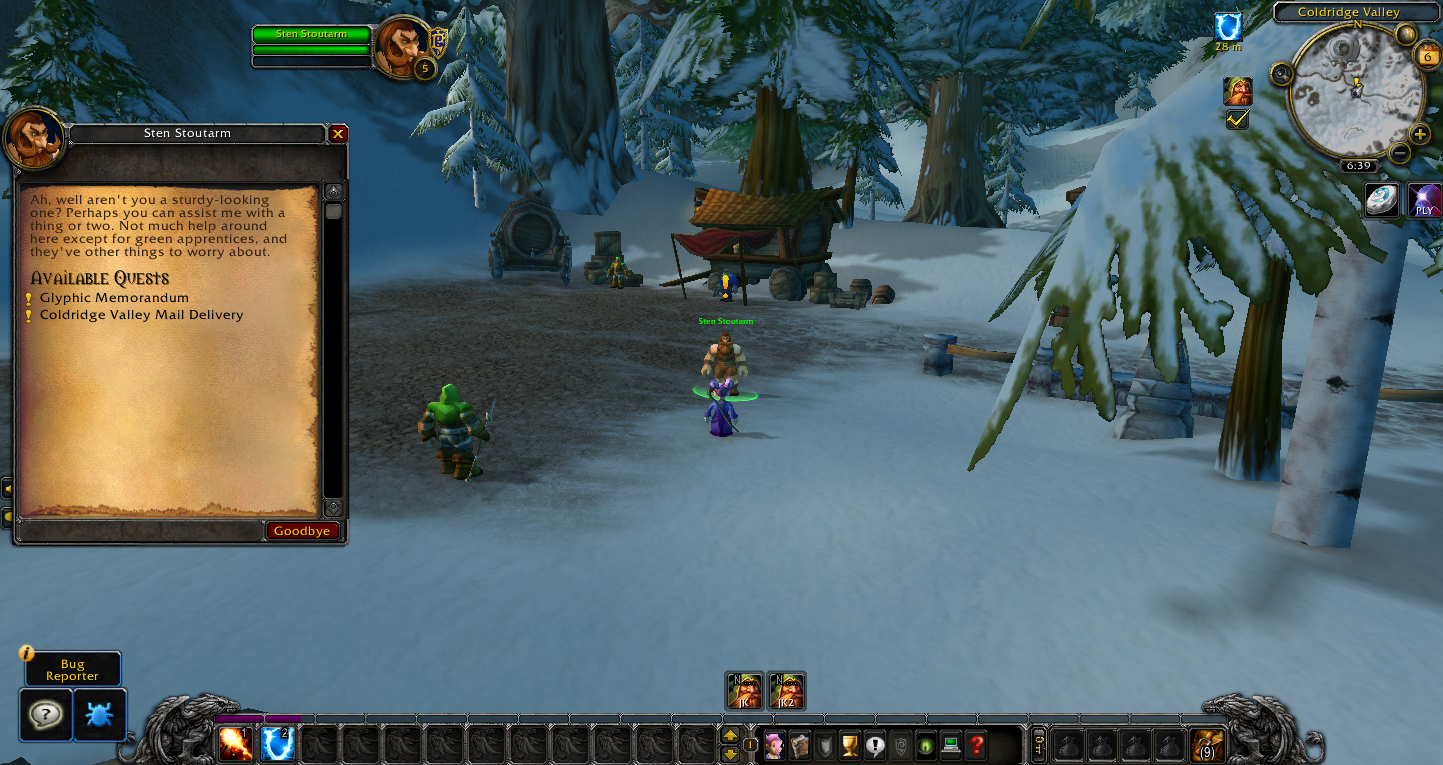
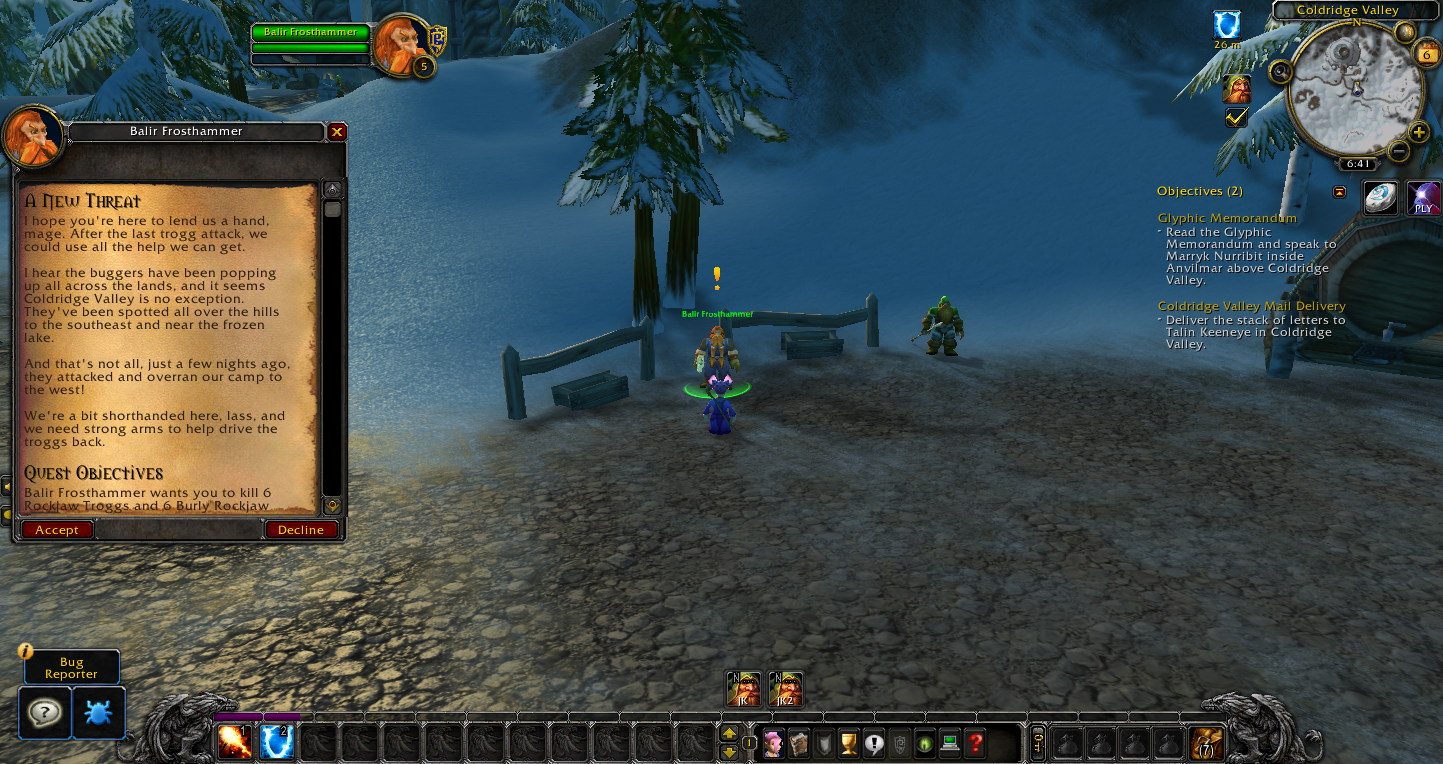
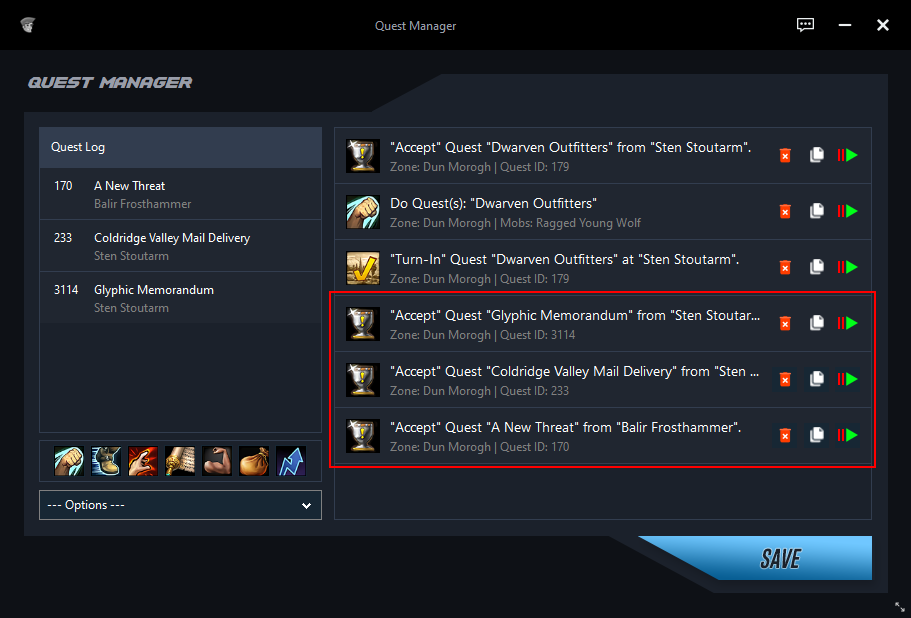
We start with the quest "A New Threat".
We will follow the same principle and create a new Do Quest event, only this time we will add 2 targets.
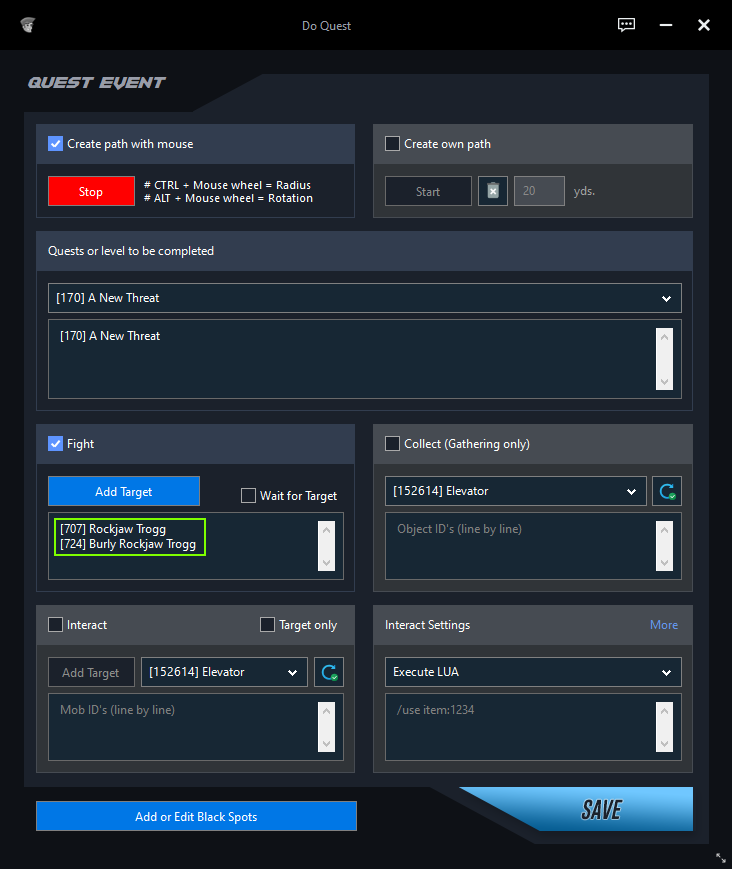
Click on "Save" to save the Do Quest event.
Grind until a certain level
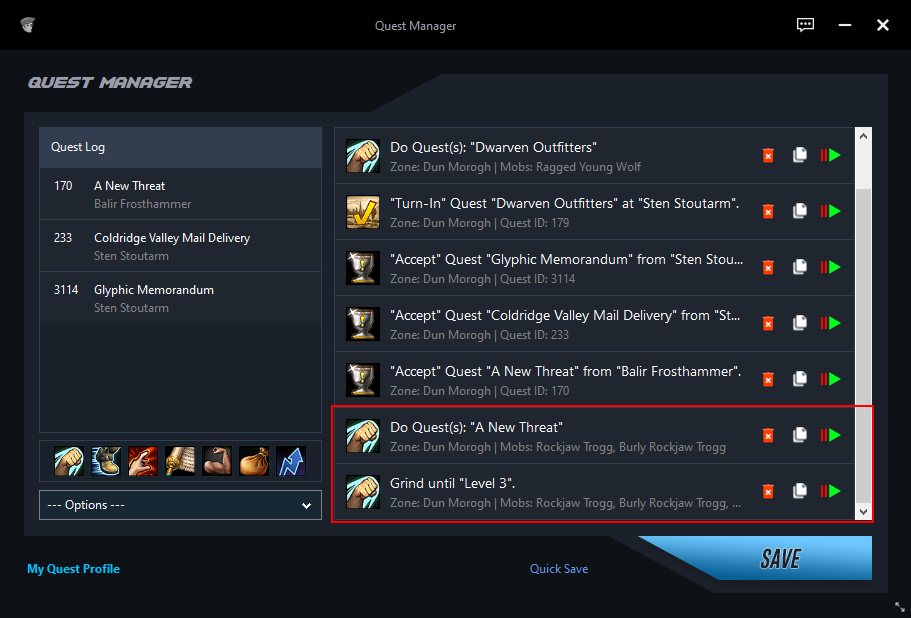
While we're at it, let's let Jack grind a bit afterwards.
So we pick up some XP for a later date.
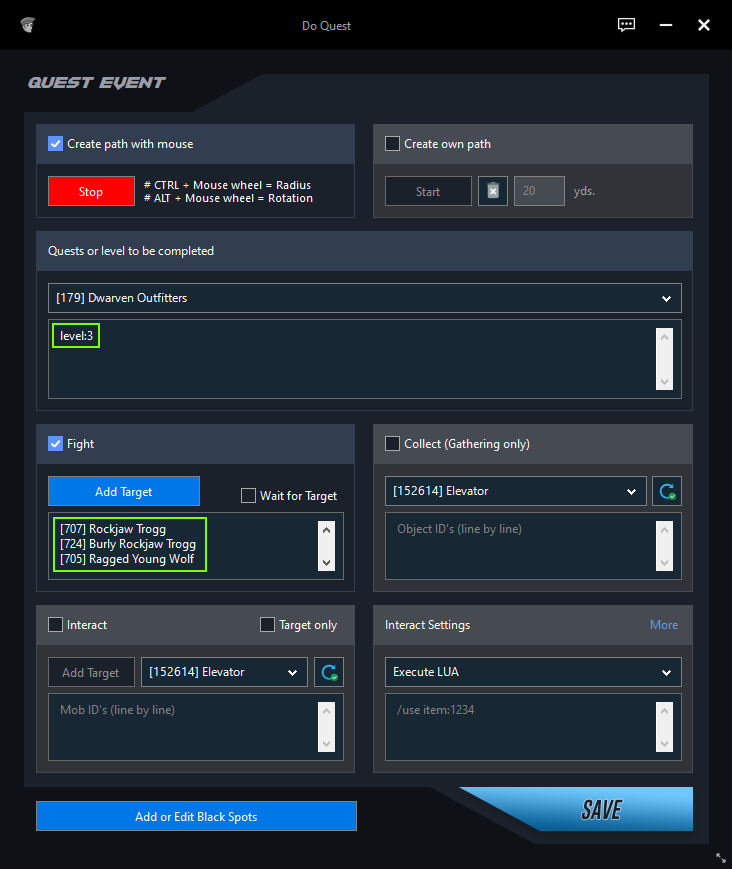
Create a new Do Quest event.
Create a path.
Add all mobs around in this area.
NPC's, Food and Drink (Vendor/Trainer)
Conclusion
We now know how to use the Quest Manager. Also, how to accept quests, complete them, and turn them in. When and where you want to accept, complete or turn-in a quest is entirely up to you. In the continuing guides you will find detailed information about each event, each function and the corresponding options. What they do and how best to use them.
Last updated