🏃♂️Create an Event
Here you will learn how to get into the Event Manager and to create and setup events.
We assume that you already have a profile that you can edit.
Otherwise, download a free profile: -> Download Free Profiles Or create your own profile: -> Create a Profile or -> Quick Start Guide
Index
Open the Event Manager
Double-click on your profile to edit.
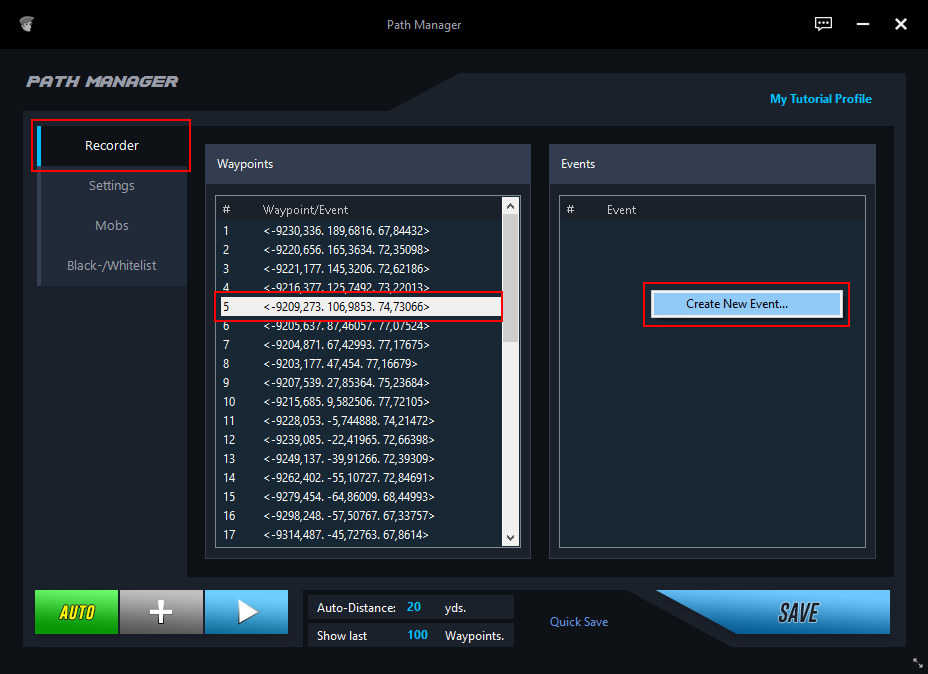
After the Path Manager has opened, select the "Recorder" tab.
Select a waypoint (any).
Right click in your "Events List" and choose "Create a new Event".
Event Manager briefly explained
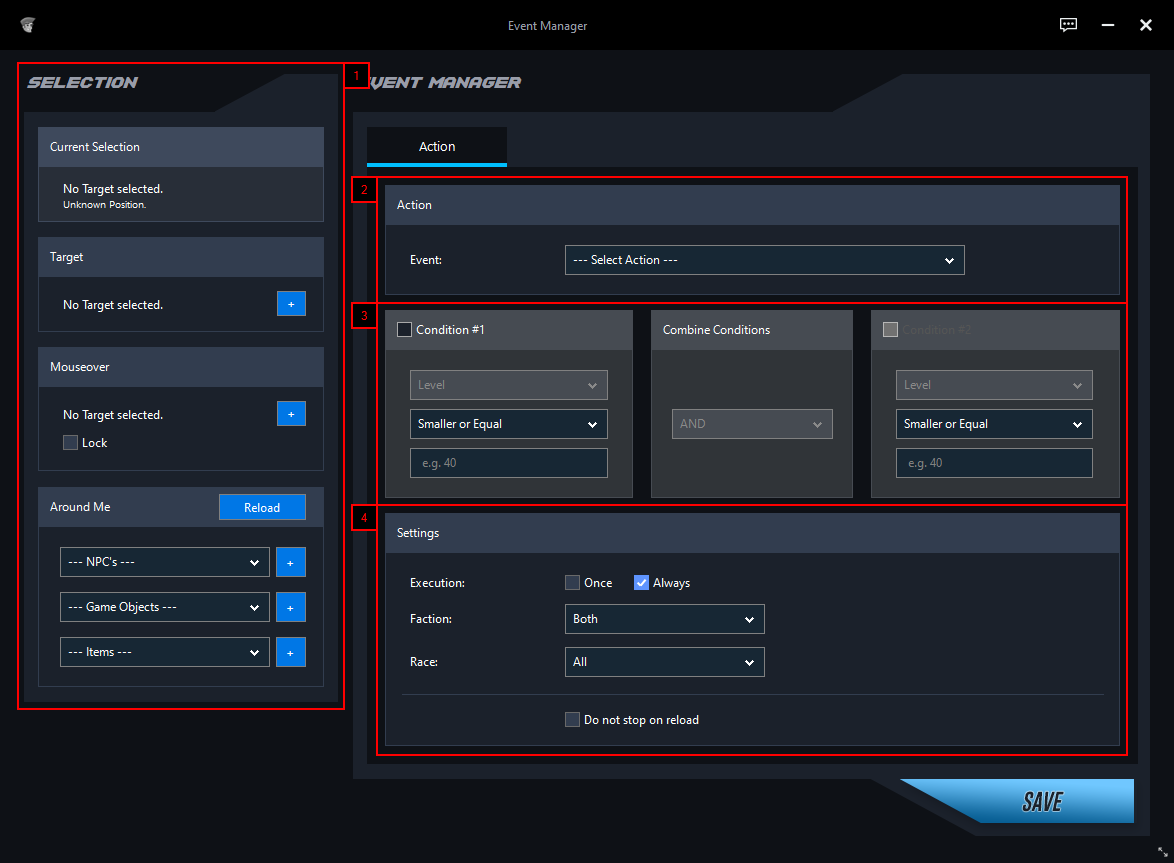
[Selection] The entire left half is used to select an NPC, object or item.
[Event] In the selection field you will find all available events.
[Conditions] Here you can set the condition(s) for the selected event.
[Settings] Here you can set additional options and conditions.
Selection
Depending on the selected event, it is necessary to select an NPC, object or item.
Tipp:
It is recommended to select the event first. Some events only require the ID. With a click on the "Plus" button, the ID is automatically transferred into the text field provided.
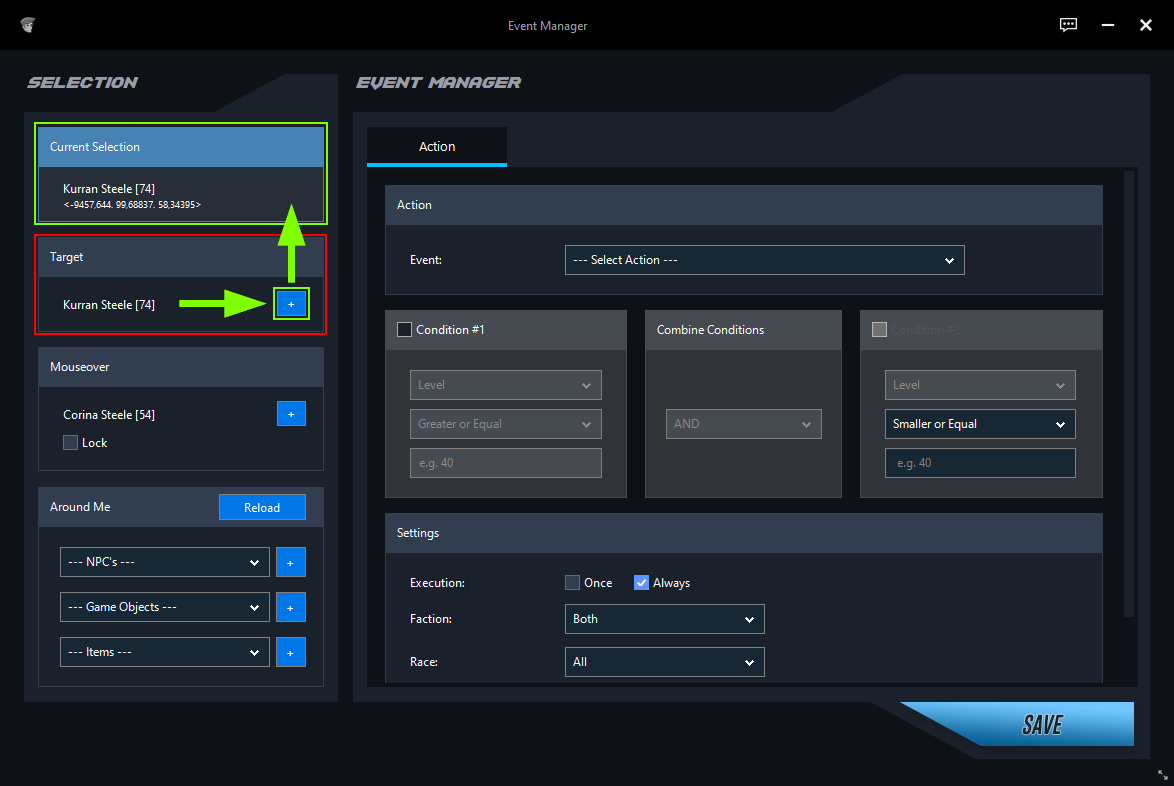
Target an NPC to display it in the target box (red).
Click on the "Plus" button you confirm your target.
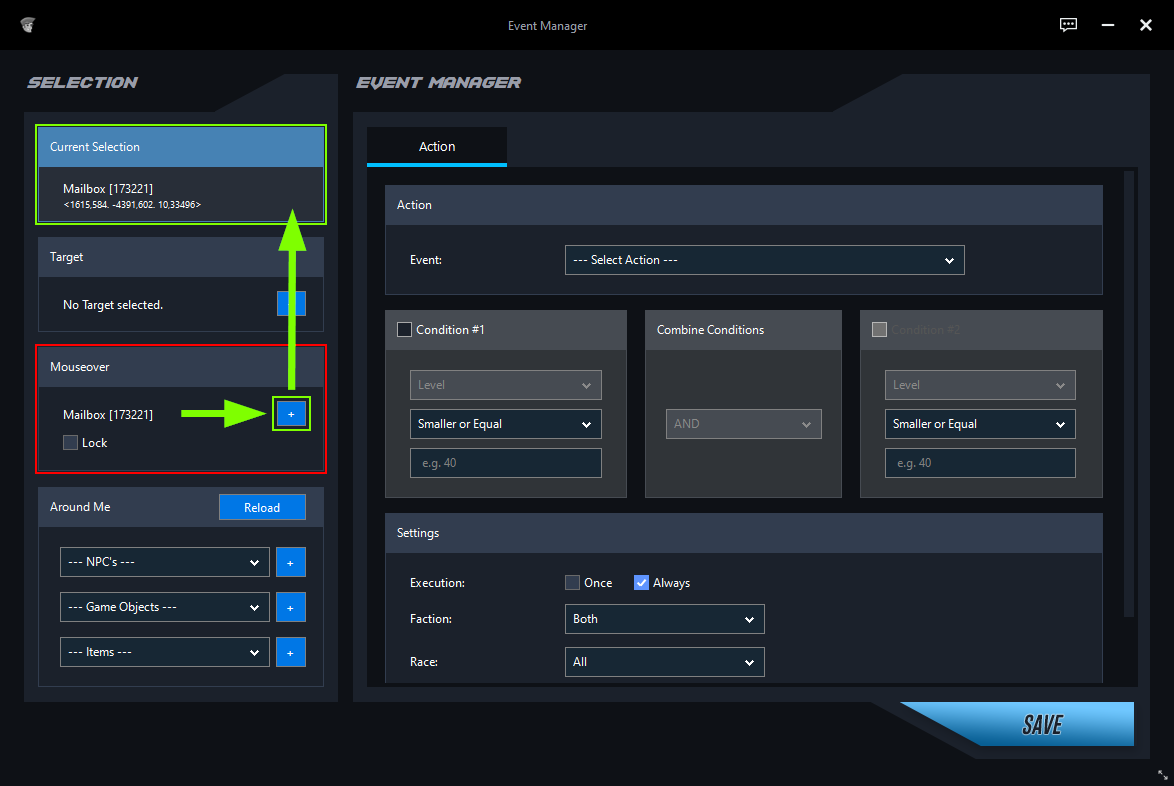
Move your mouse over an object until it is displayed in the "Mouseover" box (red).
Click on the "Plus" button you confirm the object as target.
If the object does not appear in the "Mouseover" box, you can alternatively select it in the "Around Me" box under Game Objects. Click the "Reload" button to update the selection fields.
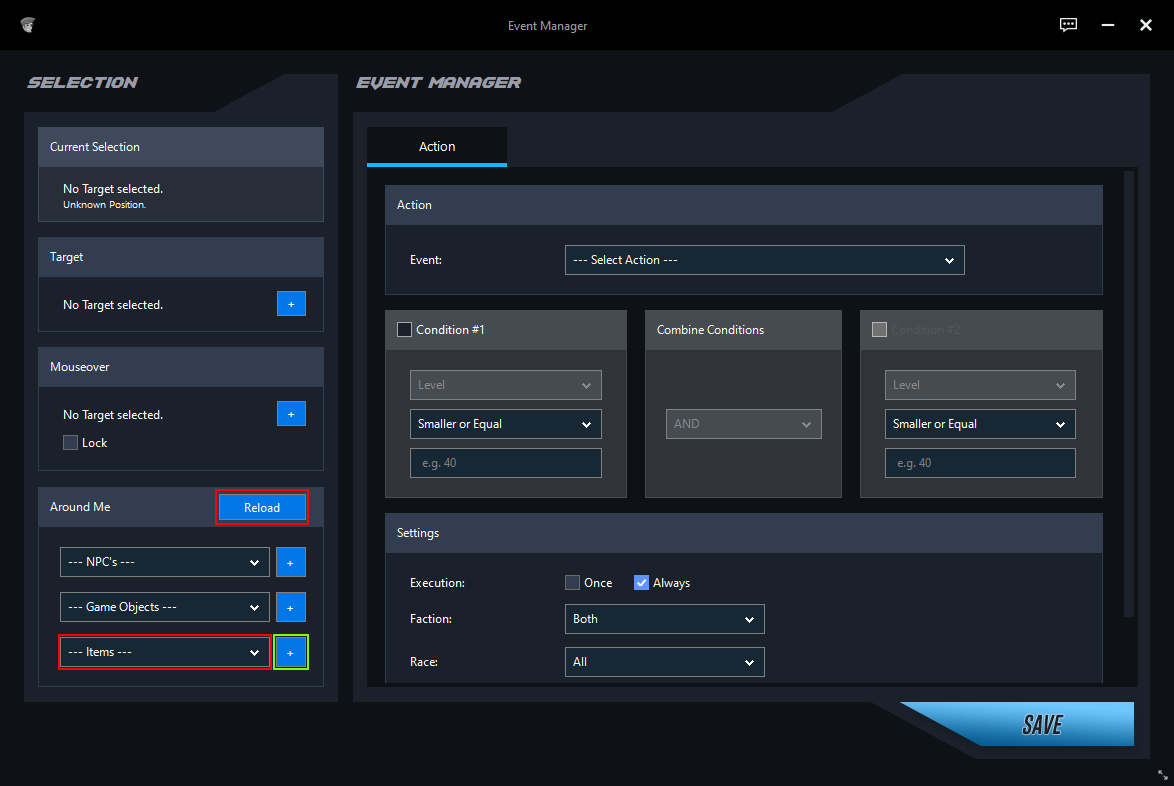
Click on the "Reload" button in the "Around Me" box.
Select the required item in the "Around Me" box under "Items".
Once the target is confirmed, you will see its name, ID and position in the "Current Selection" box (green).
Event
Select the event you want to create from the drop-down list.
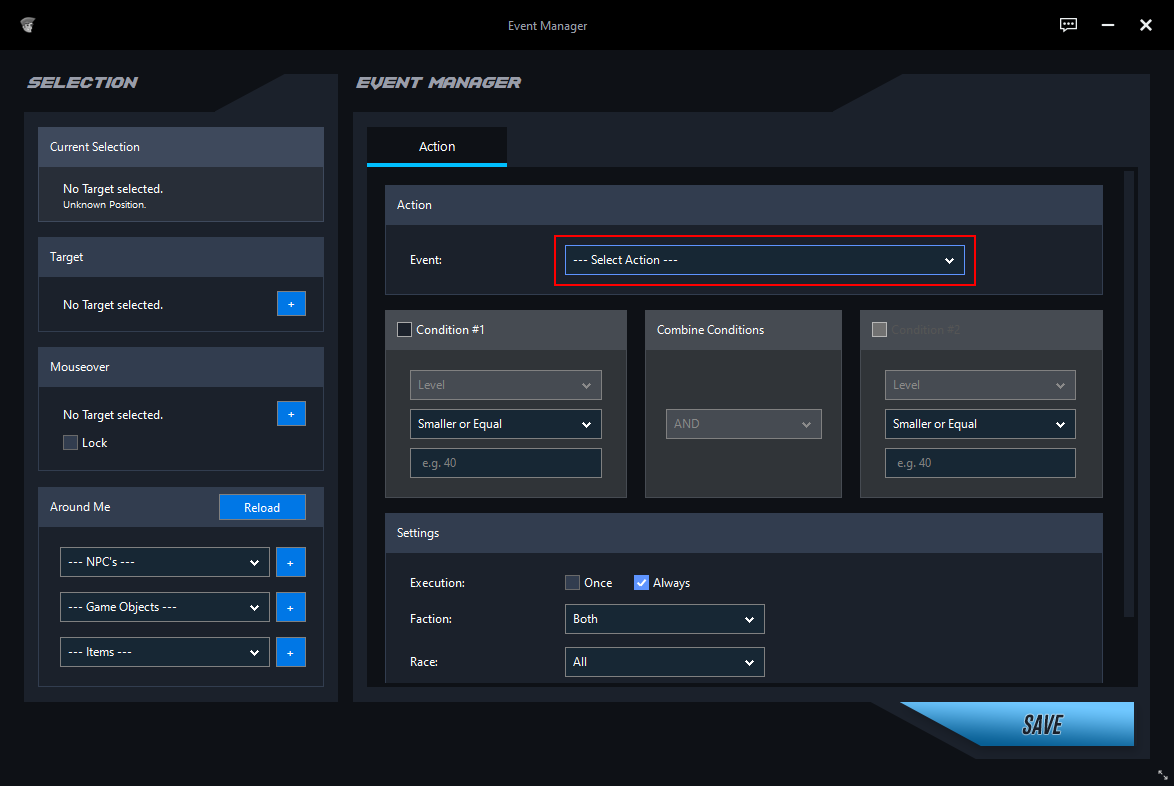
If an event ends with "..." a new tab with further options for this event will open automatically.
Conditions
A condition determines the condition under which the event is to be executed.
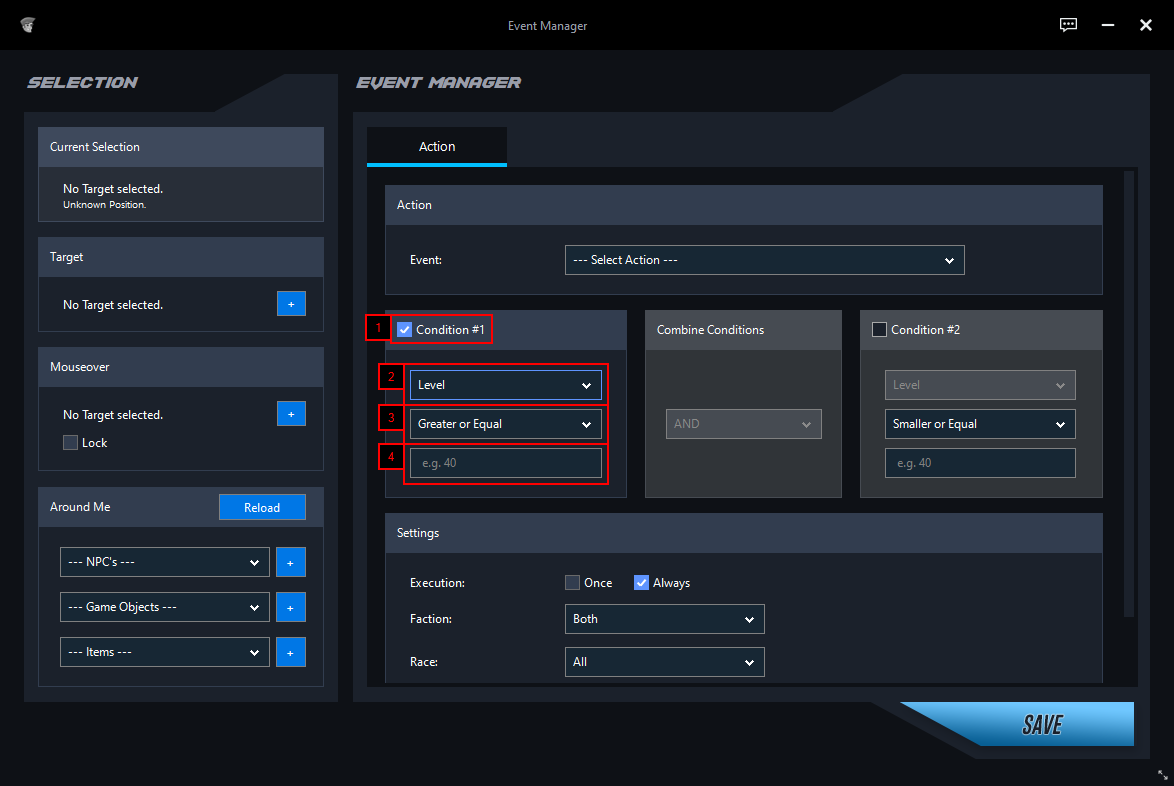
Activate "Condition #1" if you want to set a condition for this event.
Select the condition.
Depending on the condition, further options for the condition are provided in this field.
Depending on the condition, you can add more details here.
If "Execution" is set to "Always" in the event settings, a condition is necessary.
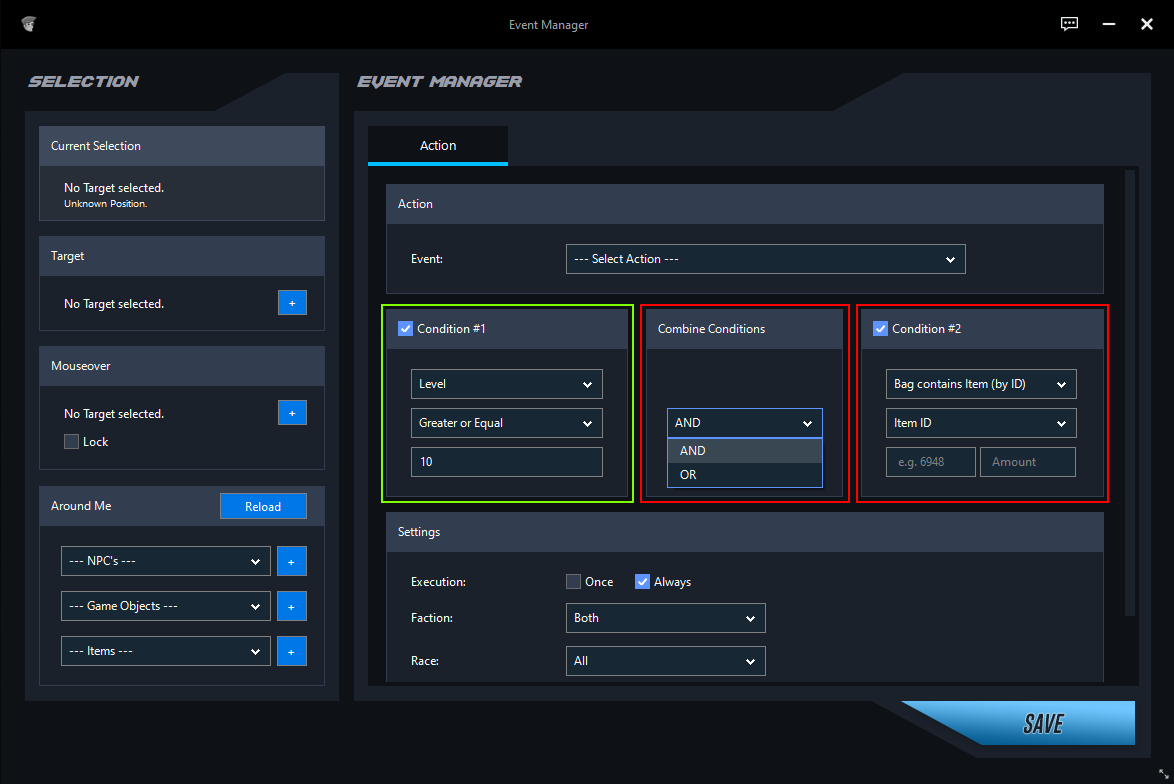
"Condition #2" can only be selected when "Condition #1" is active.
In the "Combine Conditions" box, select how you want to combine the two conditions.
Set "Condition #2" as you did for "Condition #1".
Settings
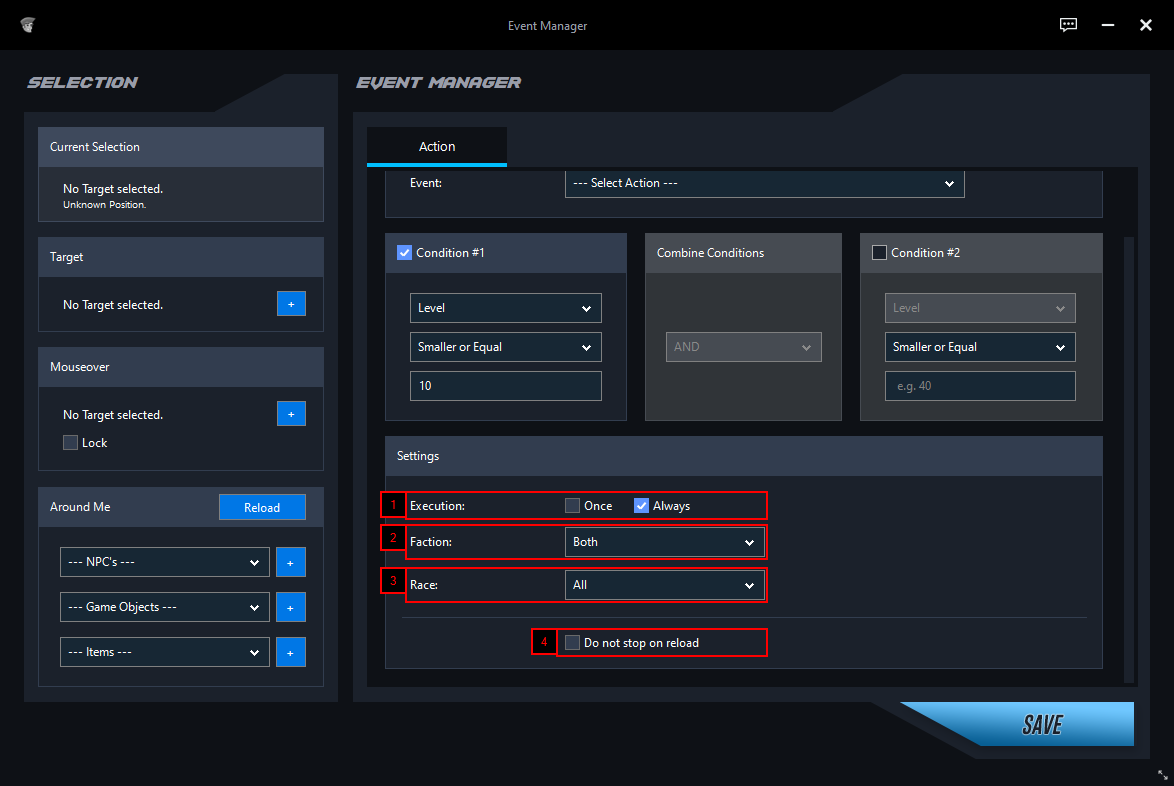
1. Execution
Once
* The event is executed once when the waypoint is reached for the first time.
Always
* The event is always executed as soon as the waypoint is reached.
* The "Add Vendor, Mailbox and More" without own route is always executed independently of the waypoint as soon as the condition applies.
2. Faction
Specify a faction as a condition.
3. Race
Specify a race as a condition.
4. Do not stop on reload
Enable this option only if you are using the "Interact with..." or "Execute LUA" event for which it is necessary to wait for a reload.
Last updated